Ajax (Asynchronous JavaScript and XML) is a set of web development techniques utilizing many web technologies used on the client-side to create asynchronous Web applications. Import jquery library in your view file to use ajax functions of jquery which will be used to send and receive data using ajax from the server. On the server side you can use the response() function to send response to client and to send response in JSON format you can chain the response function with json() function.
json() function syntax
json(string|array $data = array(), int $status = 200, array $headers = array(), int $options)
Example
Step 1 − Create a view file called resources/views/message.php and copy the following code in that file.
<html>
   <head>
      <title>Ajax Example</title>

      <script src = "https://ajax.googleapis.com/ajax/libs/jquery/2.1.3/jquery.min.js">
      </script>

      <script>
         function getMessage() {
            $.ajax({
               type:'POST',
               url:'/getmsg',
               data:'_token = <?php echo csrf_token() ?>',
               success:function(data) {
                  $("#msg").html(data.msg);
               }
            });
         }
      </script>
   </head>

   <body>
      <div id = 'msg'>This message will be replaced using Ajax.
         Click the button to replace the message.</div>
      <?php
         echo Form::button('Replace Message',['onClick'=>'getMessage()']);
      ?>
   </body>

</html>
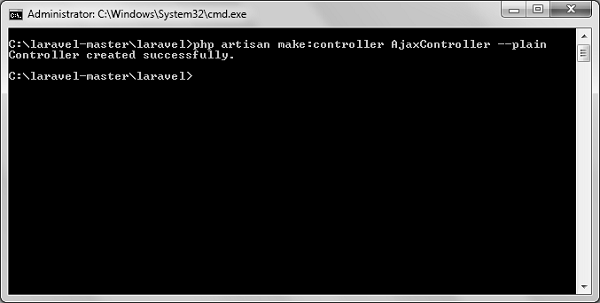
Step 2 − Create a controller called AjaxController by executing the following command.
php artisan make:controller AjaxController --plain
Step 3 − After successful execution, you will receive the following output −

Step 4 − Copy the following code in
app/Http/Controllers/AjaxController.php file.
app/Http/Controllers/AjaxController.php
<?php

namespace App\Http\Controllers;

use Illuminate\Http\Request;
use App\Http\Requests;
use App\Http\Controllers\Controller;

class AjaxController extends Controller {
   public function index() {
      $msg = "This is a simple message.";
      return response()->json(array('msg'=> $msg), 200);
   }
}
Step 5 − Add the following lines in app/Http/routes.php.
app/Http/routes.php
Route::get('ajax',function() {
   return view('message');
});
Route::post('/getmsg','AjaxController@index');
Step 6 − Visit the following URL to test the Ajax functionality.
http://localhost:8000/ajax
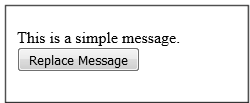
Step 7 − You will be redirected to a page where you will see a message as shown in the following image.

Step 8 − The output will appear as shown in the following image after clicking the button.

Leave a Reply